Creating Social Templates in GenStudio
Creating the templates for GenStudio for Performance Marketing requires nuance to implement the templates with sufficient flexibility and capability to support the needs of the marketers using the templates. In this article, we’ll build on the instructions in the Customize a Template documentation to clarify some of the nuance so you as a template developer can write templates for Genstudio more effectively.
As an added note, this article is as accurate as possible at the time of writing. GentStudio for Performance Marketing is a rapidly evolving solution (just compare the capabilities between Adobe MAX and Adobe Summit).
Template Types
Conceptually, GenStudio supports three types of templates:
- Social (Meta, LinkedIn)
- Display
The three different types have different capabilities and requirements that you need to consider during the development process. For this article, we’re going to focus on social templates.
What is a Social Template?
Social templates are used for generating image Ad content for use on social platforms. The currently supported social channels are:
- Meta (Instagram / Facebook)
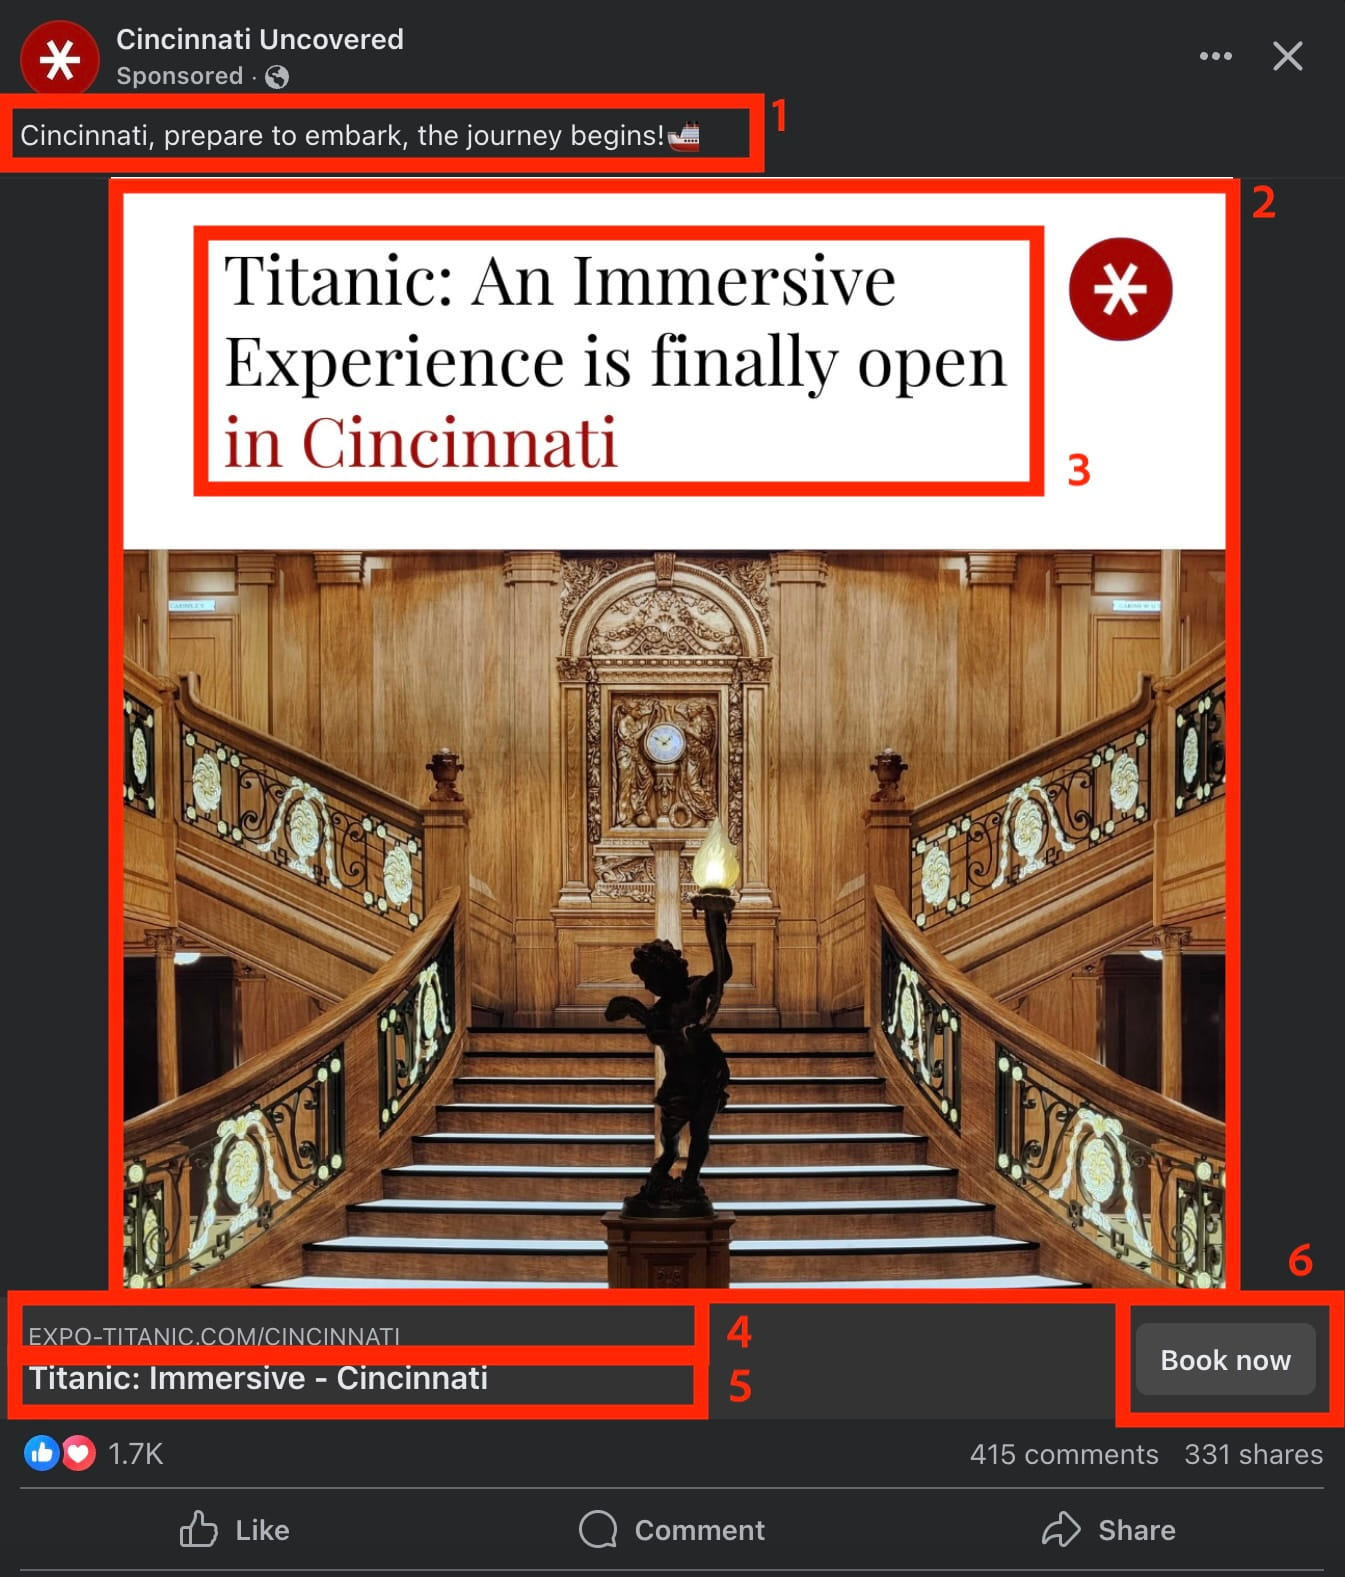
GenStudio generates the text for both the areas surrounding the ad and can generate on image text. Consider this example Ad from my Facebook feed, I’ve highted all of the relevant areas:

body- the primary text displaying on top of the ad, will expand if longerimage- the image for the Ad, one of the primary outputs of GenStudio will be this entire flattened image to place as the Ad. This image could be just a standard image, an image with text placed over it, or a more complex layout with a partially covering image and another background area as is shown in this example.on_image_text- this text is generated by GenStudiolink- a preview linkheadline- a short blurb generated by GenStudiocta- selected from a vocabulary of CTA values and a URL
Of these, only the image and on_image_text actually belong in the template. The other fields are implicitly defined for all social ads and will be included with the output from GenStudio either when publishing/activating the experience or in the CSV when exporting the experience.
Responsive Social Template
The simplest form of a social template, is just an image, or in the example below an image with on_image_text placed over the image.
A few nice features about this template are:
- It’s responsive and can be reused on every aspect ratio
- The background image is using CSS to position the image rather than a div with a
background-imagedirective, which has issues when trying to edit in GenStudio - It places a semi-opaque mask behind the
on_image_textfield above the image to improve readability
This template is released under the Unilicense and is completely free to use as you see fit:
<!DOCTYPE html>
<html>
  <head>
    <meta charset="UTF-8" />
    <meta name="viewport" content="width=device-width, initial-scale=1.0" />
    <title>Adobe</title>
    <style>
      .ad-container {
        font-family: Helvetica, sans-serif;
        position: relative;
        text-align: center;
        height: 100%;
      }
      .ad-image {
        width: 100%;
        height: 100%;
        object-fit: cover;
      }
      .ad-text {
        position: absolute;
        top: 0;
        left: 0;
        margin: 1em;
        background-color: rgba(0, 0, 0, 0.5);
        color: white;
        padding: 1em;
        font-size: 75px;
      }
    </style>
  </head>
  <body>
    <div class="ad-container">
      <img src="{{ image }}" alt="Ad Image" class="ad-image" />
      <div class="ad-text">{{ on_image_text }}</div>
    </div>
  </body>
</html>
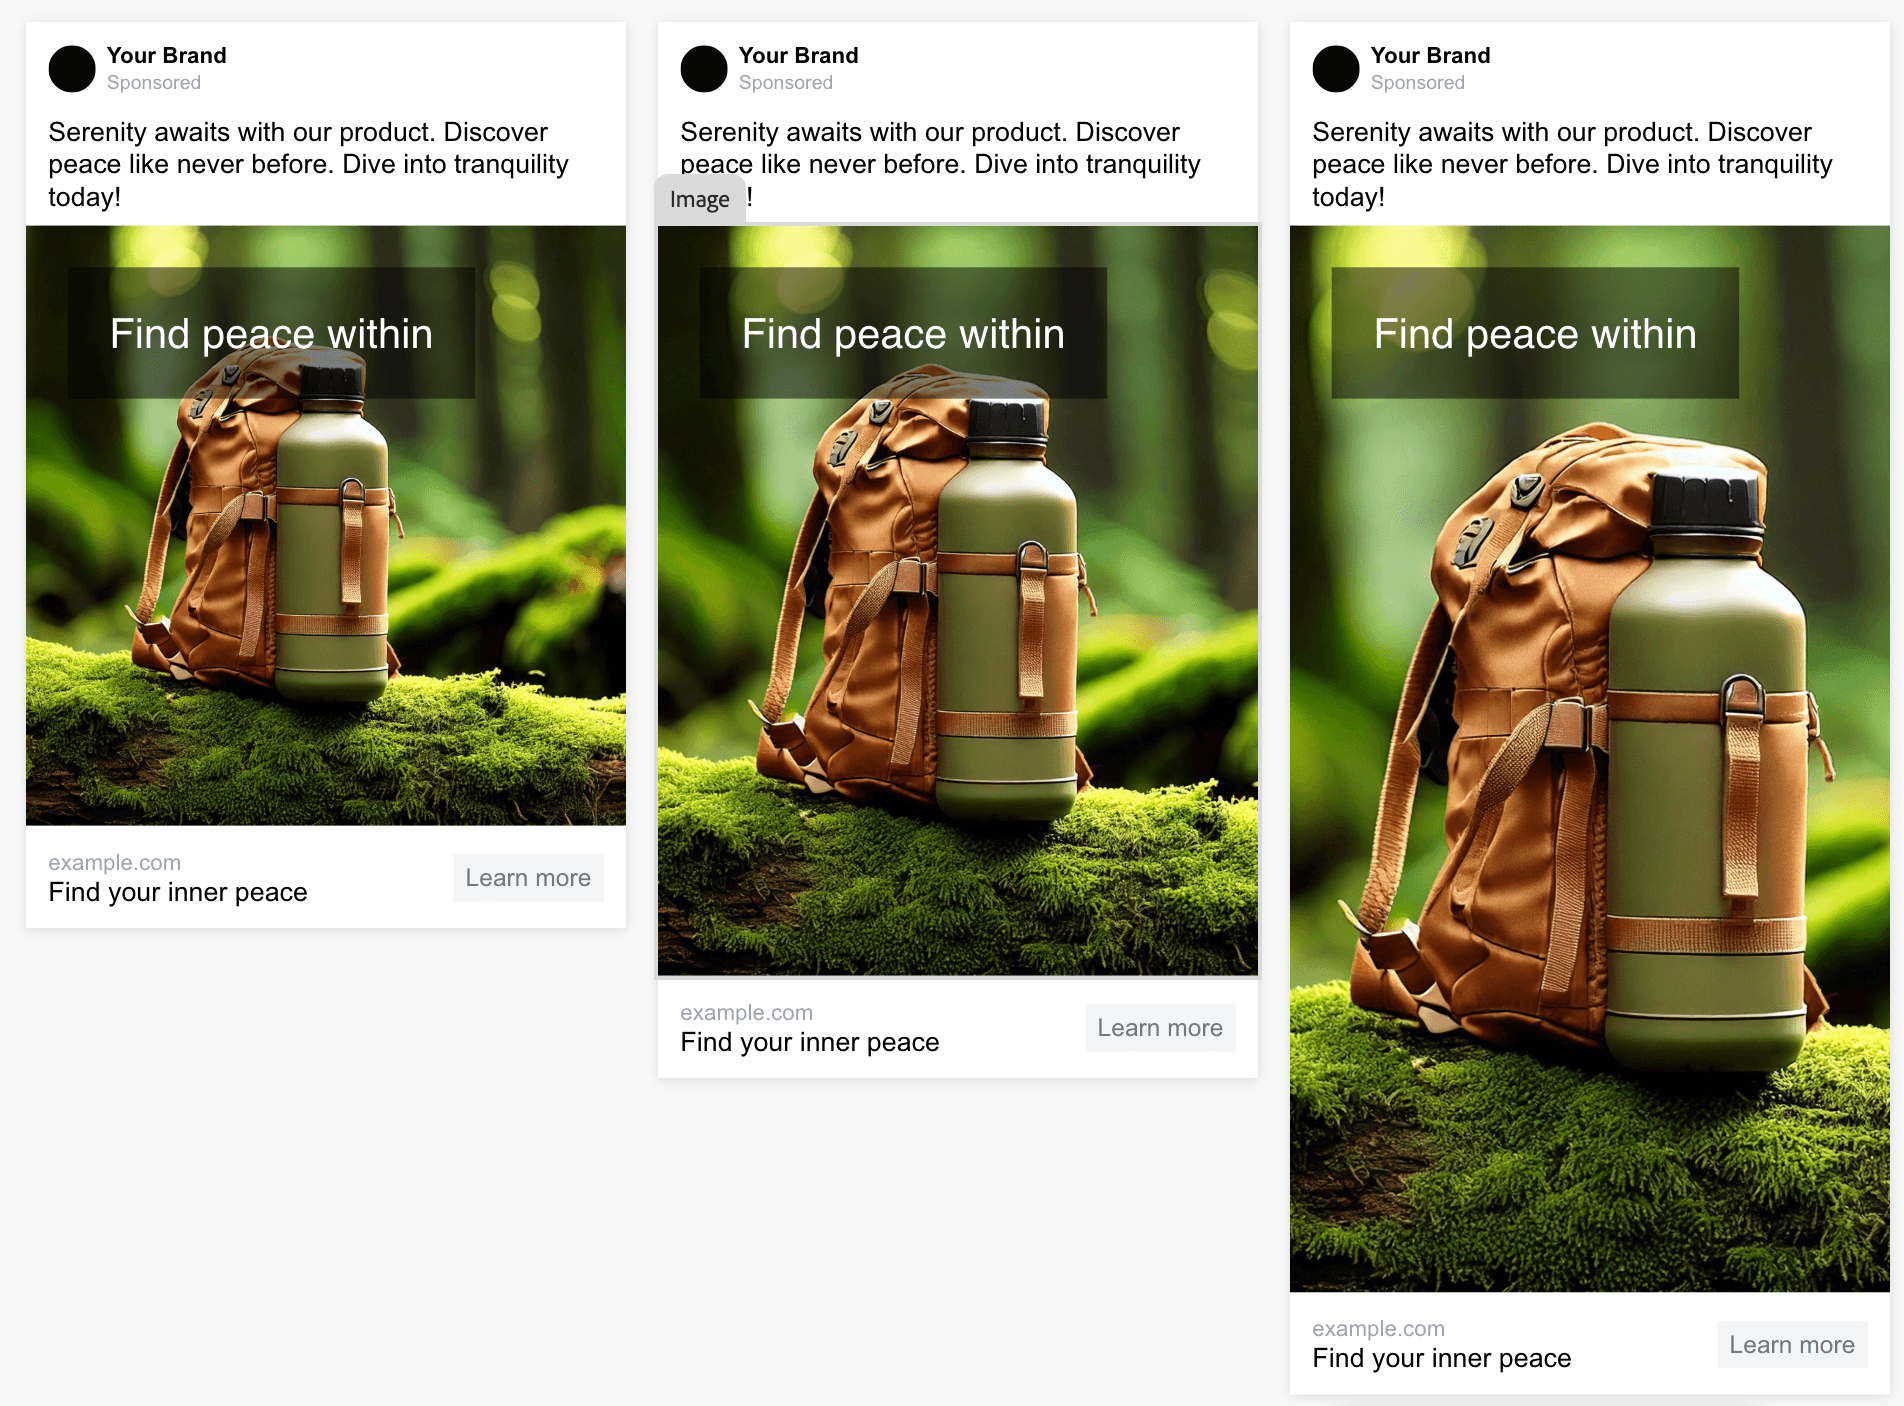
You can see an example of the experiences created with this template below:

Since this template is responsive, I can create three template aspect-ratio variants with the same file without any further modification.
Complex Templates
The responsive template works well for simple use cases, but how about more complex examples like our original Facebook ad?
In this ad, we need to tell GenStudio the dimensions to which to crop the image to avoid the image appearing skewed or having an odd crop position because the size of the overall ad isn’t the same as the size of the image.
Time to math!
Social ads in GenStudio edited in a view that is scaled to 300px wide, below are the ad sizes for the supported aspect ratios:
| Aspect Ratio | Height (px) |
|---|---|
| 1:1 | 300 |
| 4:5 | 375 |
| 9:16 | 533.3 |
The template below will add 100px tall bar above the image in the ad and fill the remaining area with the image. Note that the generated image will keep the same aspect ratio and ratio between elements but will be larger than the preview in GenStudio.
<!DOCTYPE html>
<html>
  <head>
    <meta charset="UTF-8" />
    <meta name="viewport" content="width=device-width, initial-scale=1.0" />
    <title>Adobe</title>
    <style>
      .ad-container {
        font-family: Helvetica, sans-serif;
        position: relative;
        text-align: center;
        height: 100%;
      }
      .ad-image {
        width: 100%;
        aspect-ratio: 3:2;
        object-fit: cover;
      }
      .ad-text {
        height: 100px;
        font-size: 75px;
        background-color: black;
        color: white;
        padding: 1em 0;
      }
    </style>
  </head>
  <body>
    <div class="ad-container">
      <div class="ad-text">{{ on_image_text }}</div>
      <img src="{{ image }}" alt="Ad Image" class="ad-image" />
    </div>
  </body>
</html>
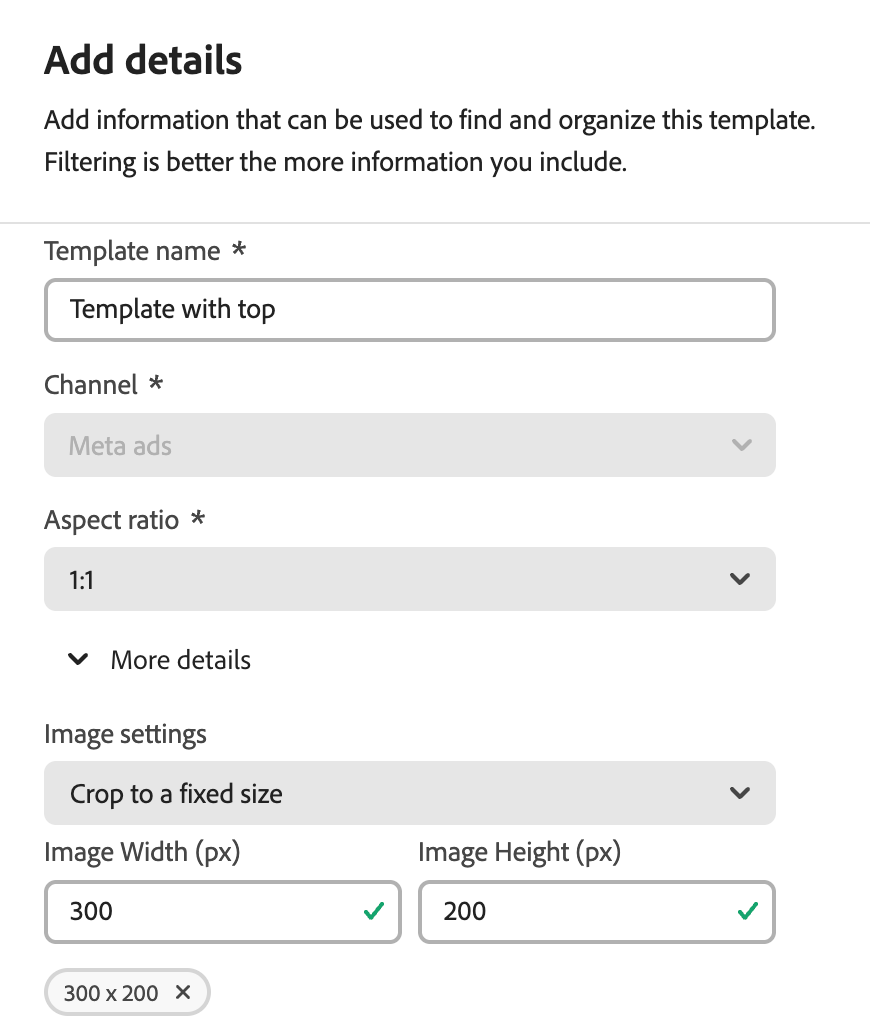
To use this template, you must also set explicit crop dimensions which will vary based on the aspect ratio of the template and the top bar. For our example template with 100px top bar and a 1:1 aspect ratio:

Unlike our responsive template, you will need to customize the template for each aspect ratio, fixing the aspect-ratio css directive for each template and adjusting the image crop dimensions for each template.
Next Steps
Now that we have our templates, we can create content in GenStudio for Performance Marketing!